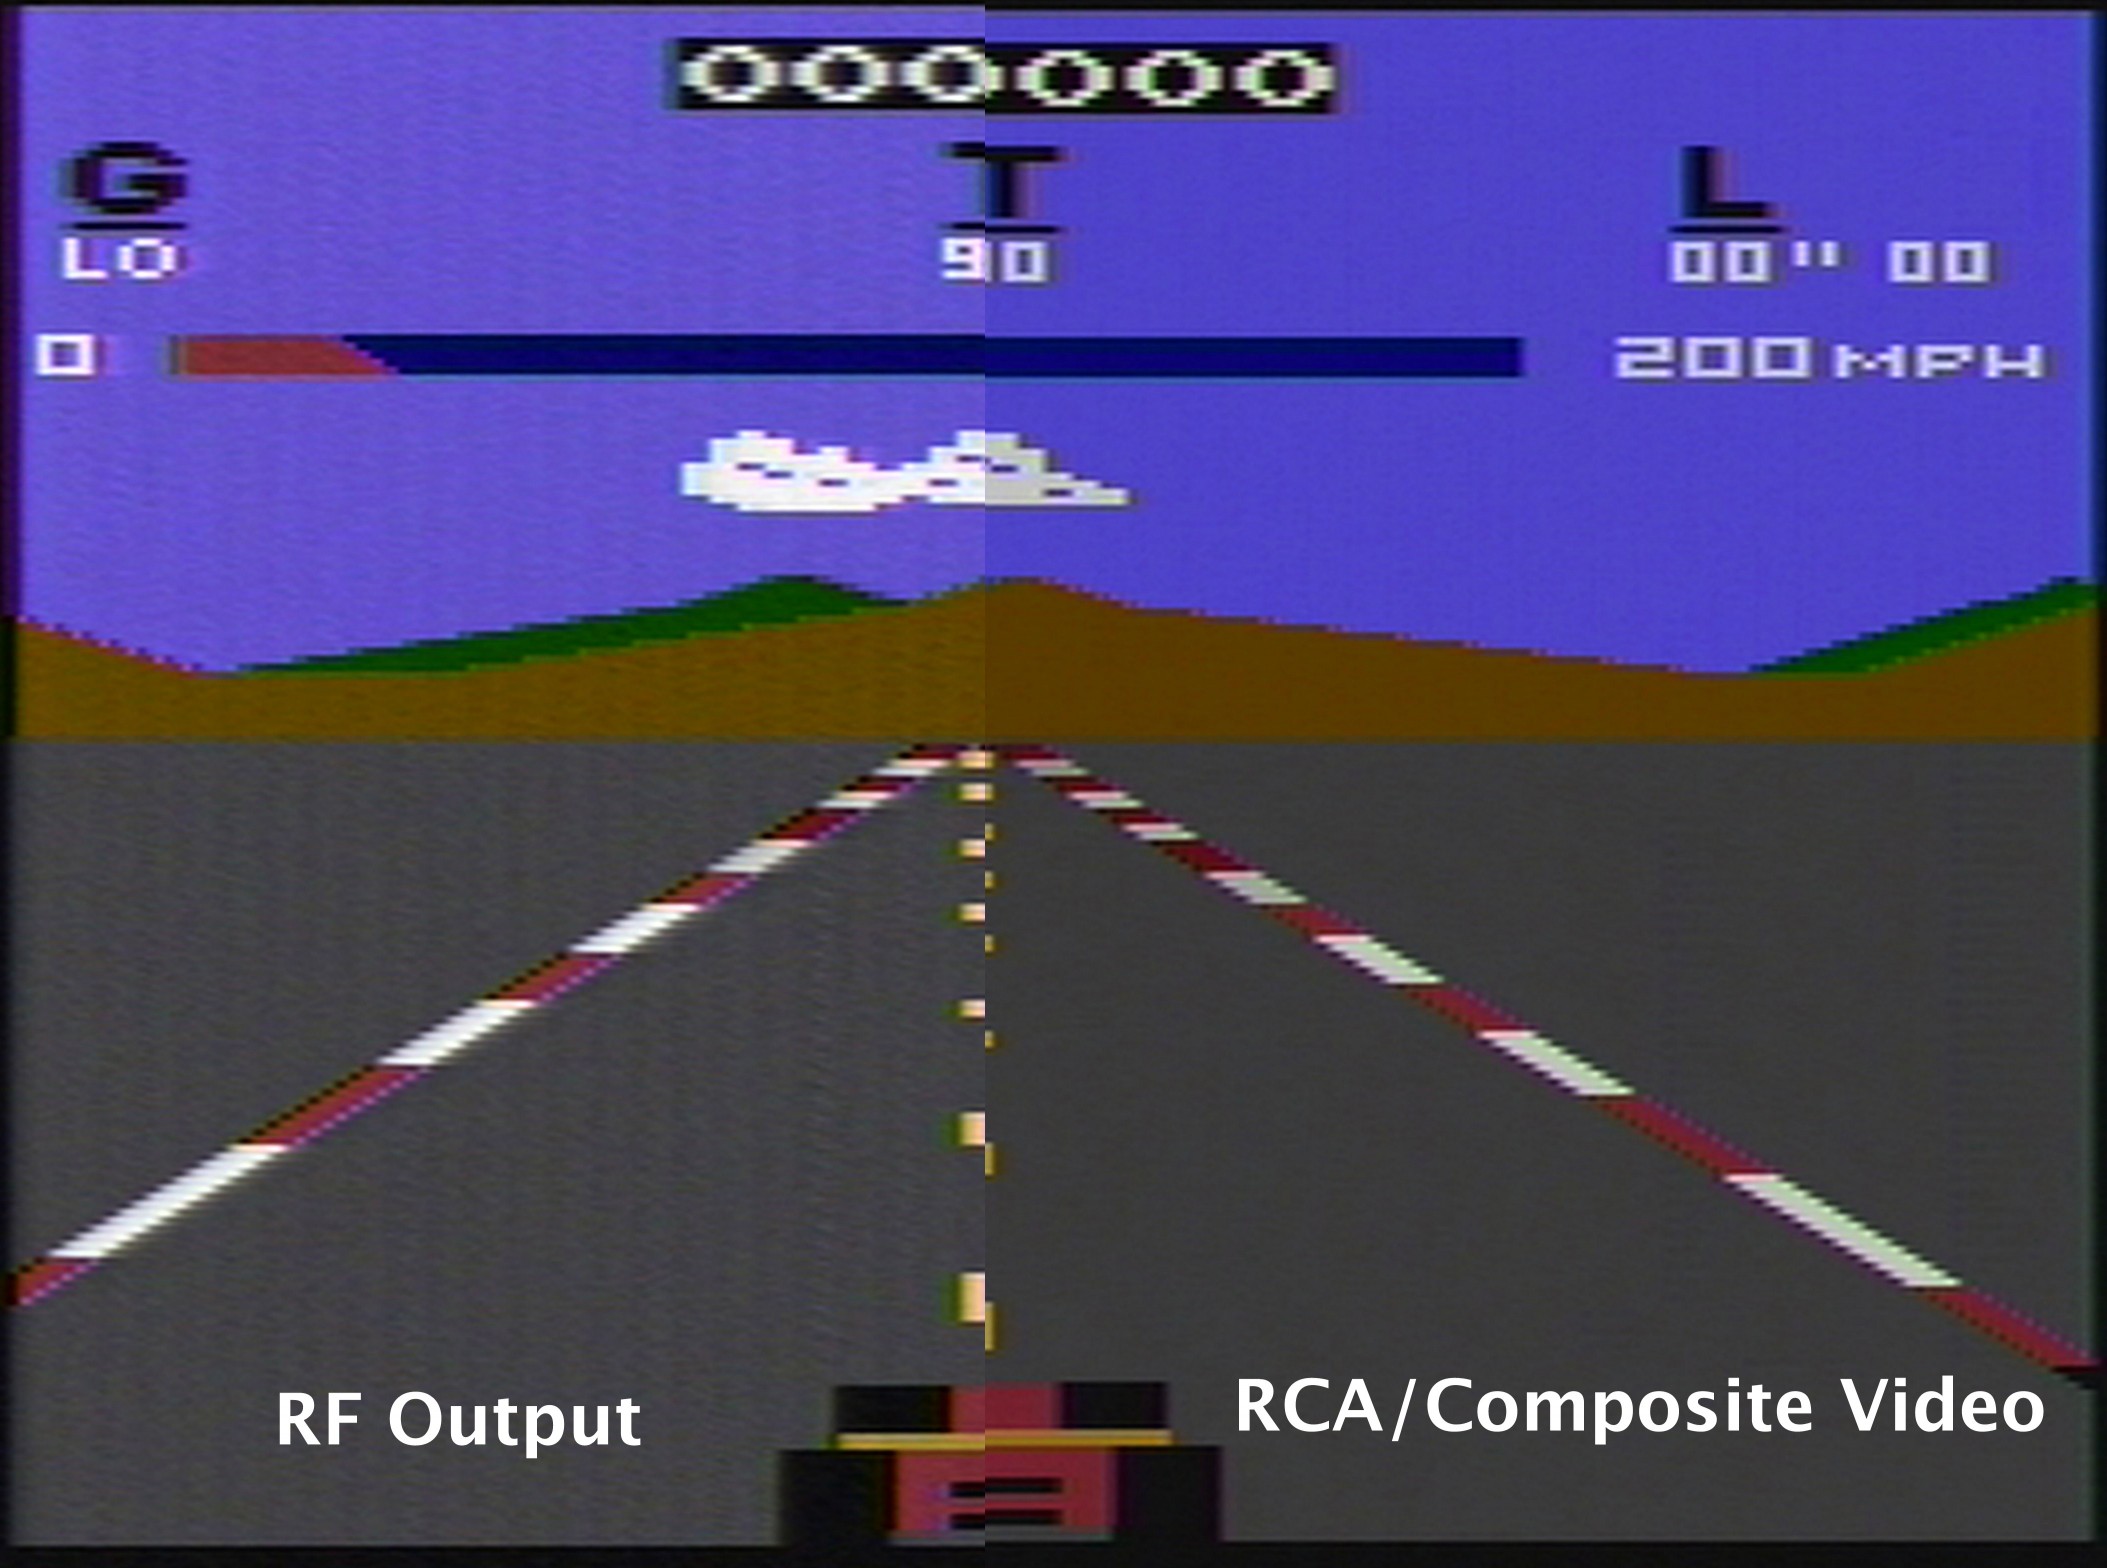
The 2.0 video mod uses an improved video amplifier from the original and features a built in brightness control. This allows you to fine tune the brightness for your specific Atari and TV/monitor combination. There are a lot of variations in the different model Ataris and how they render on TV’s can also vary so the brightness control and better ampliofied offers a better overall picture than the original.
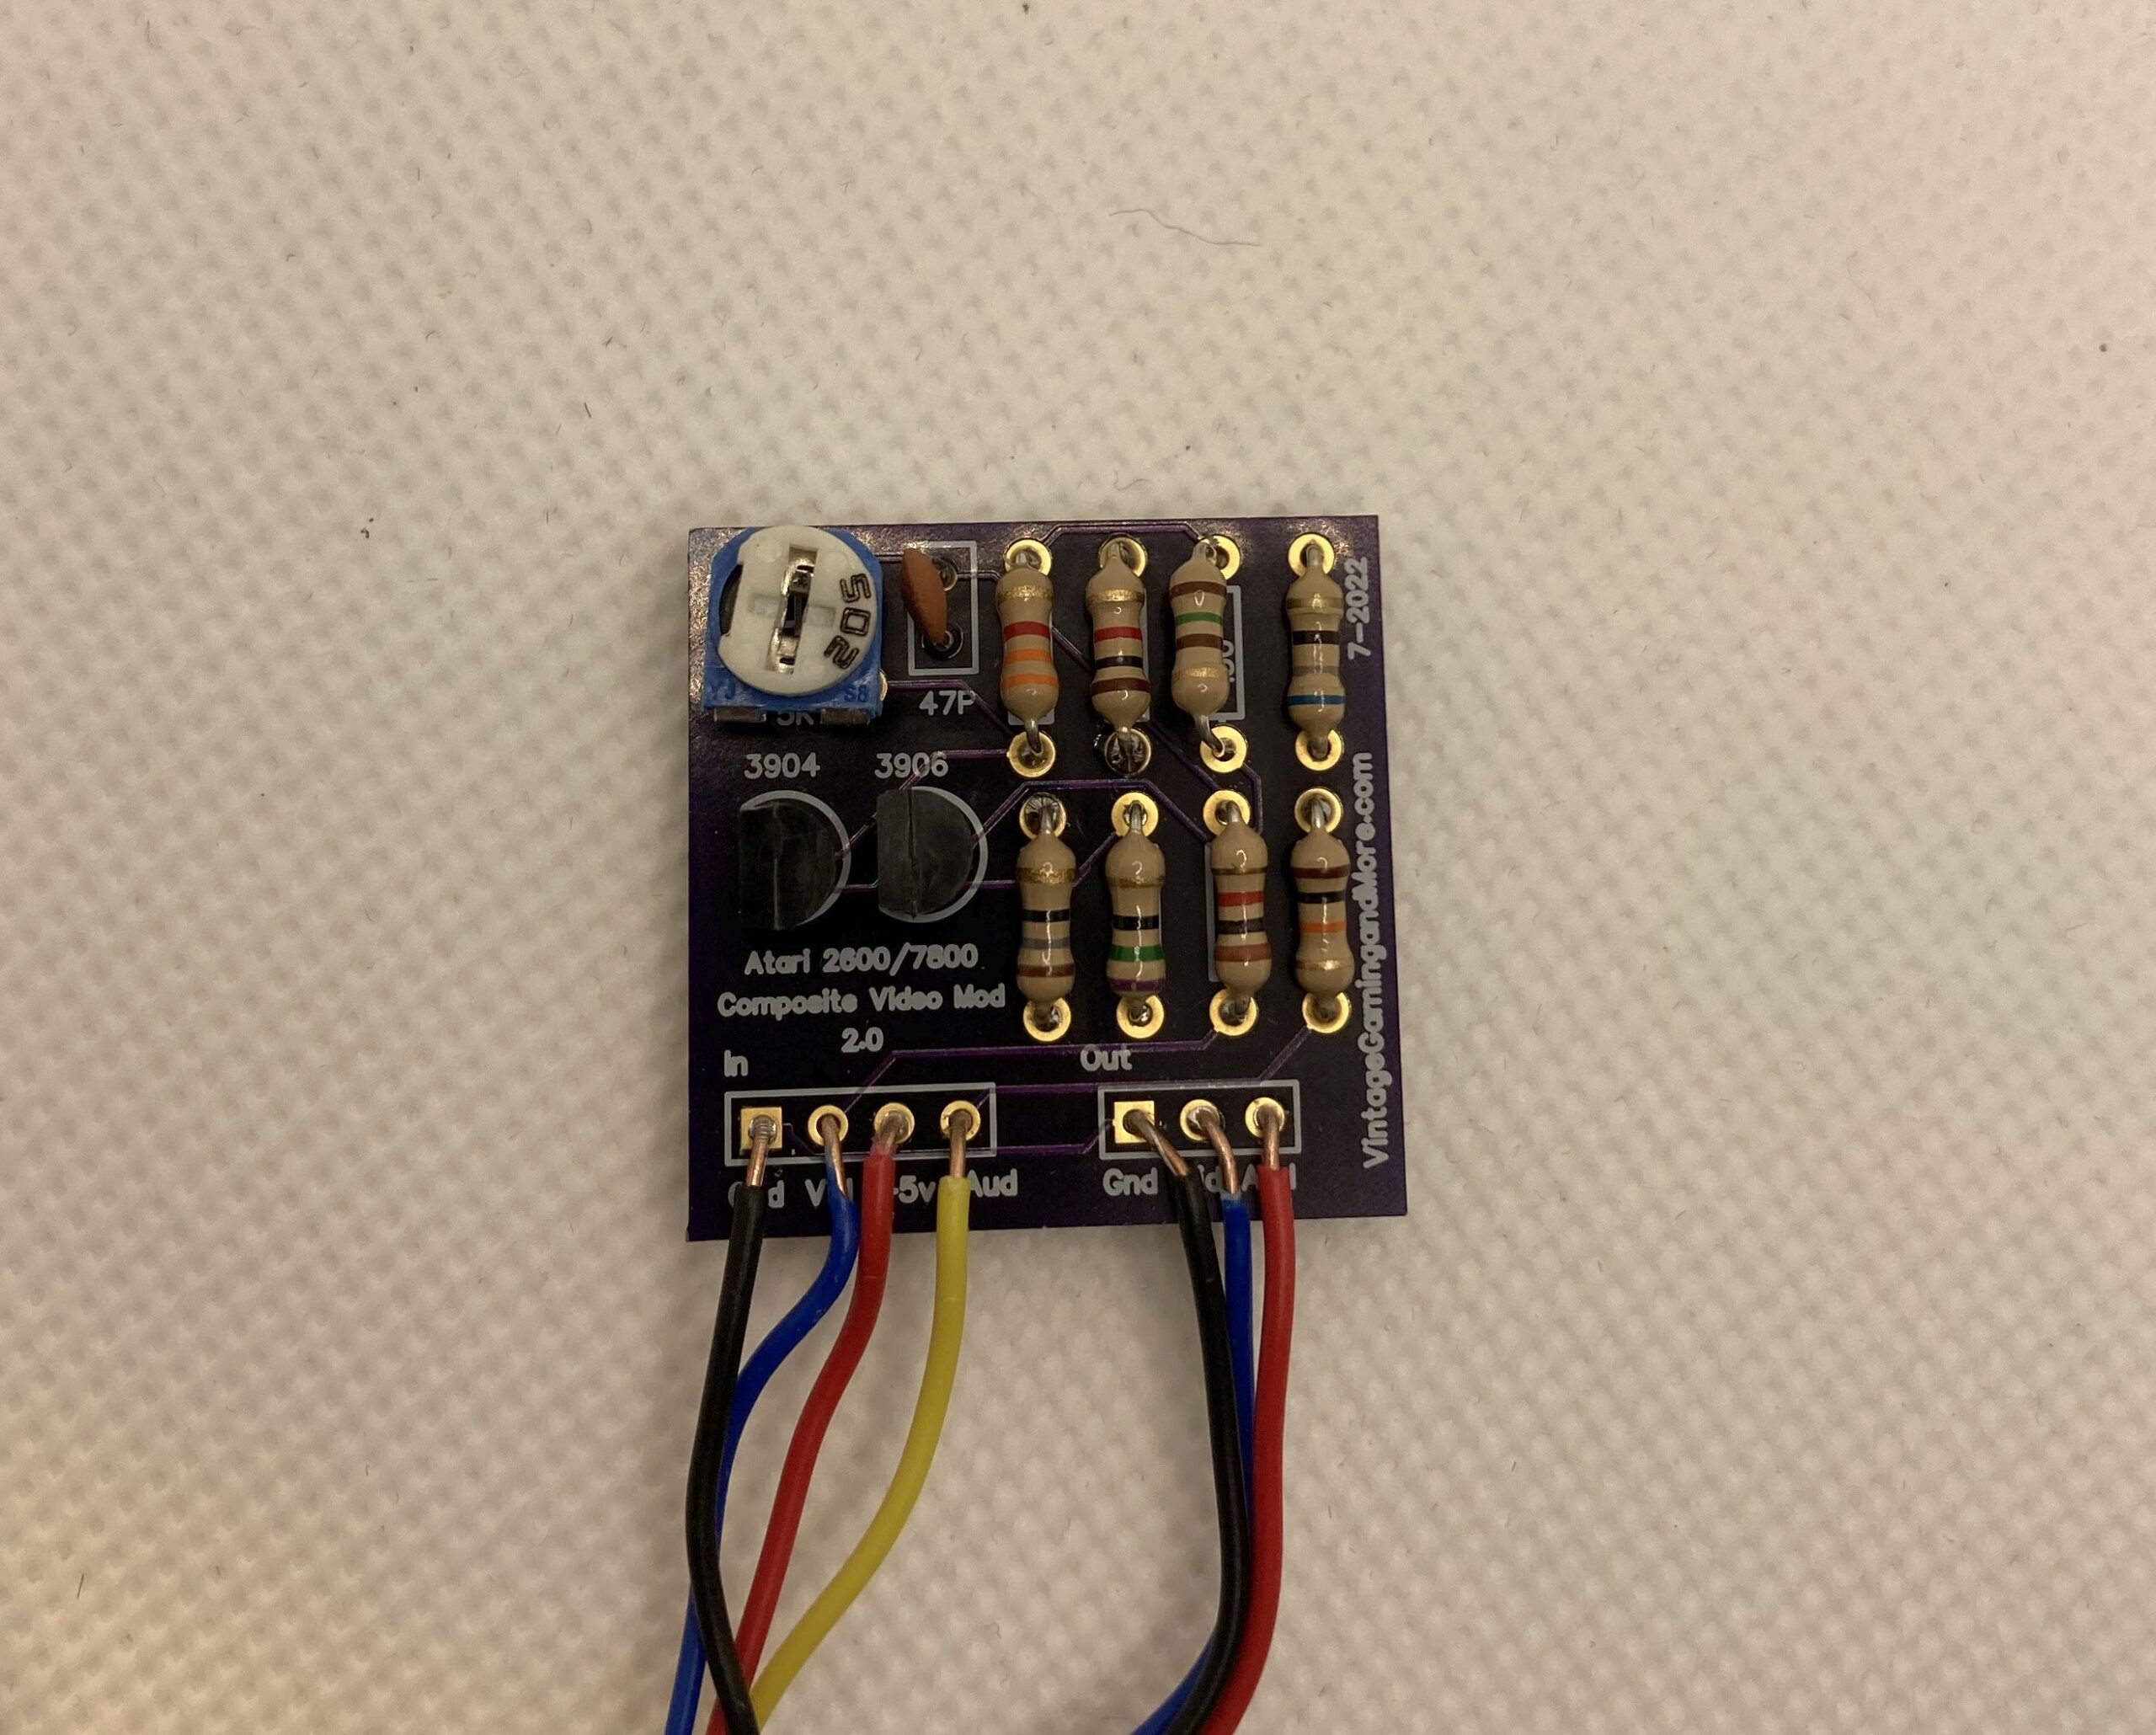
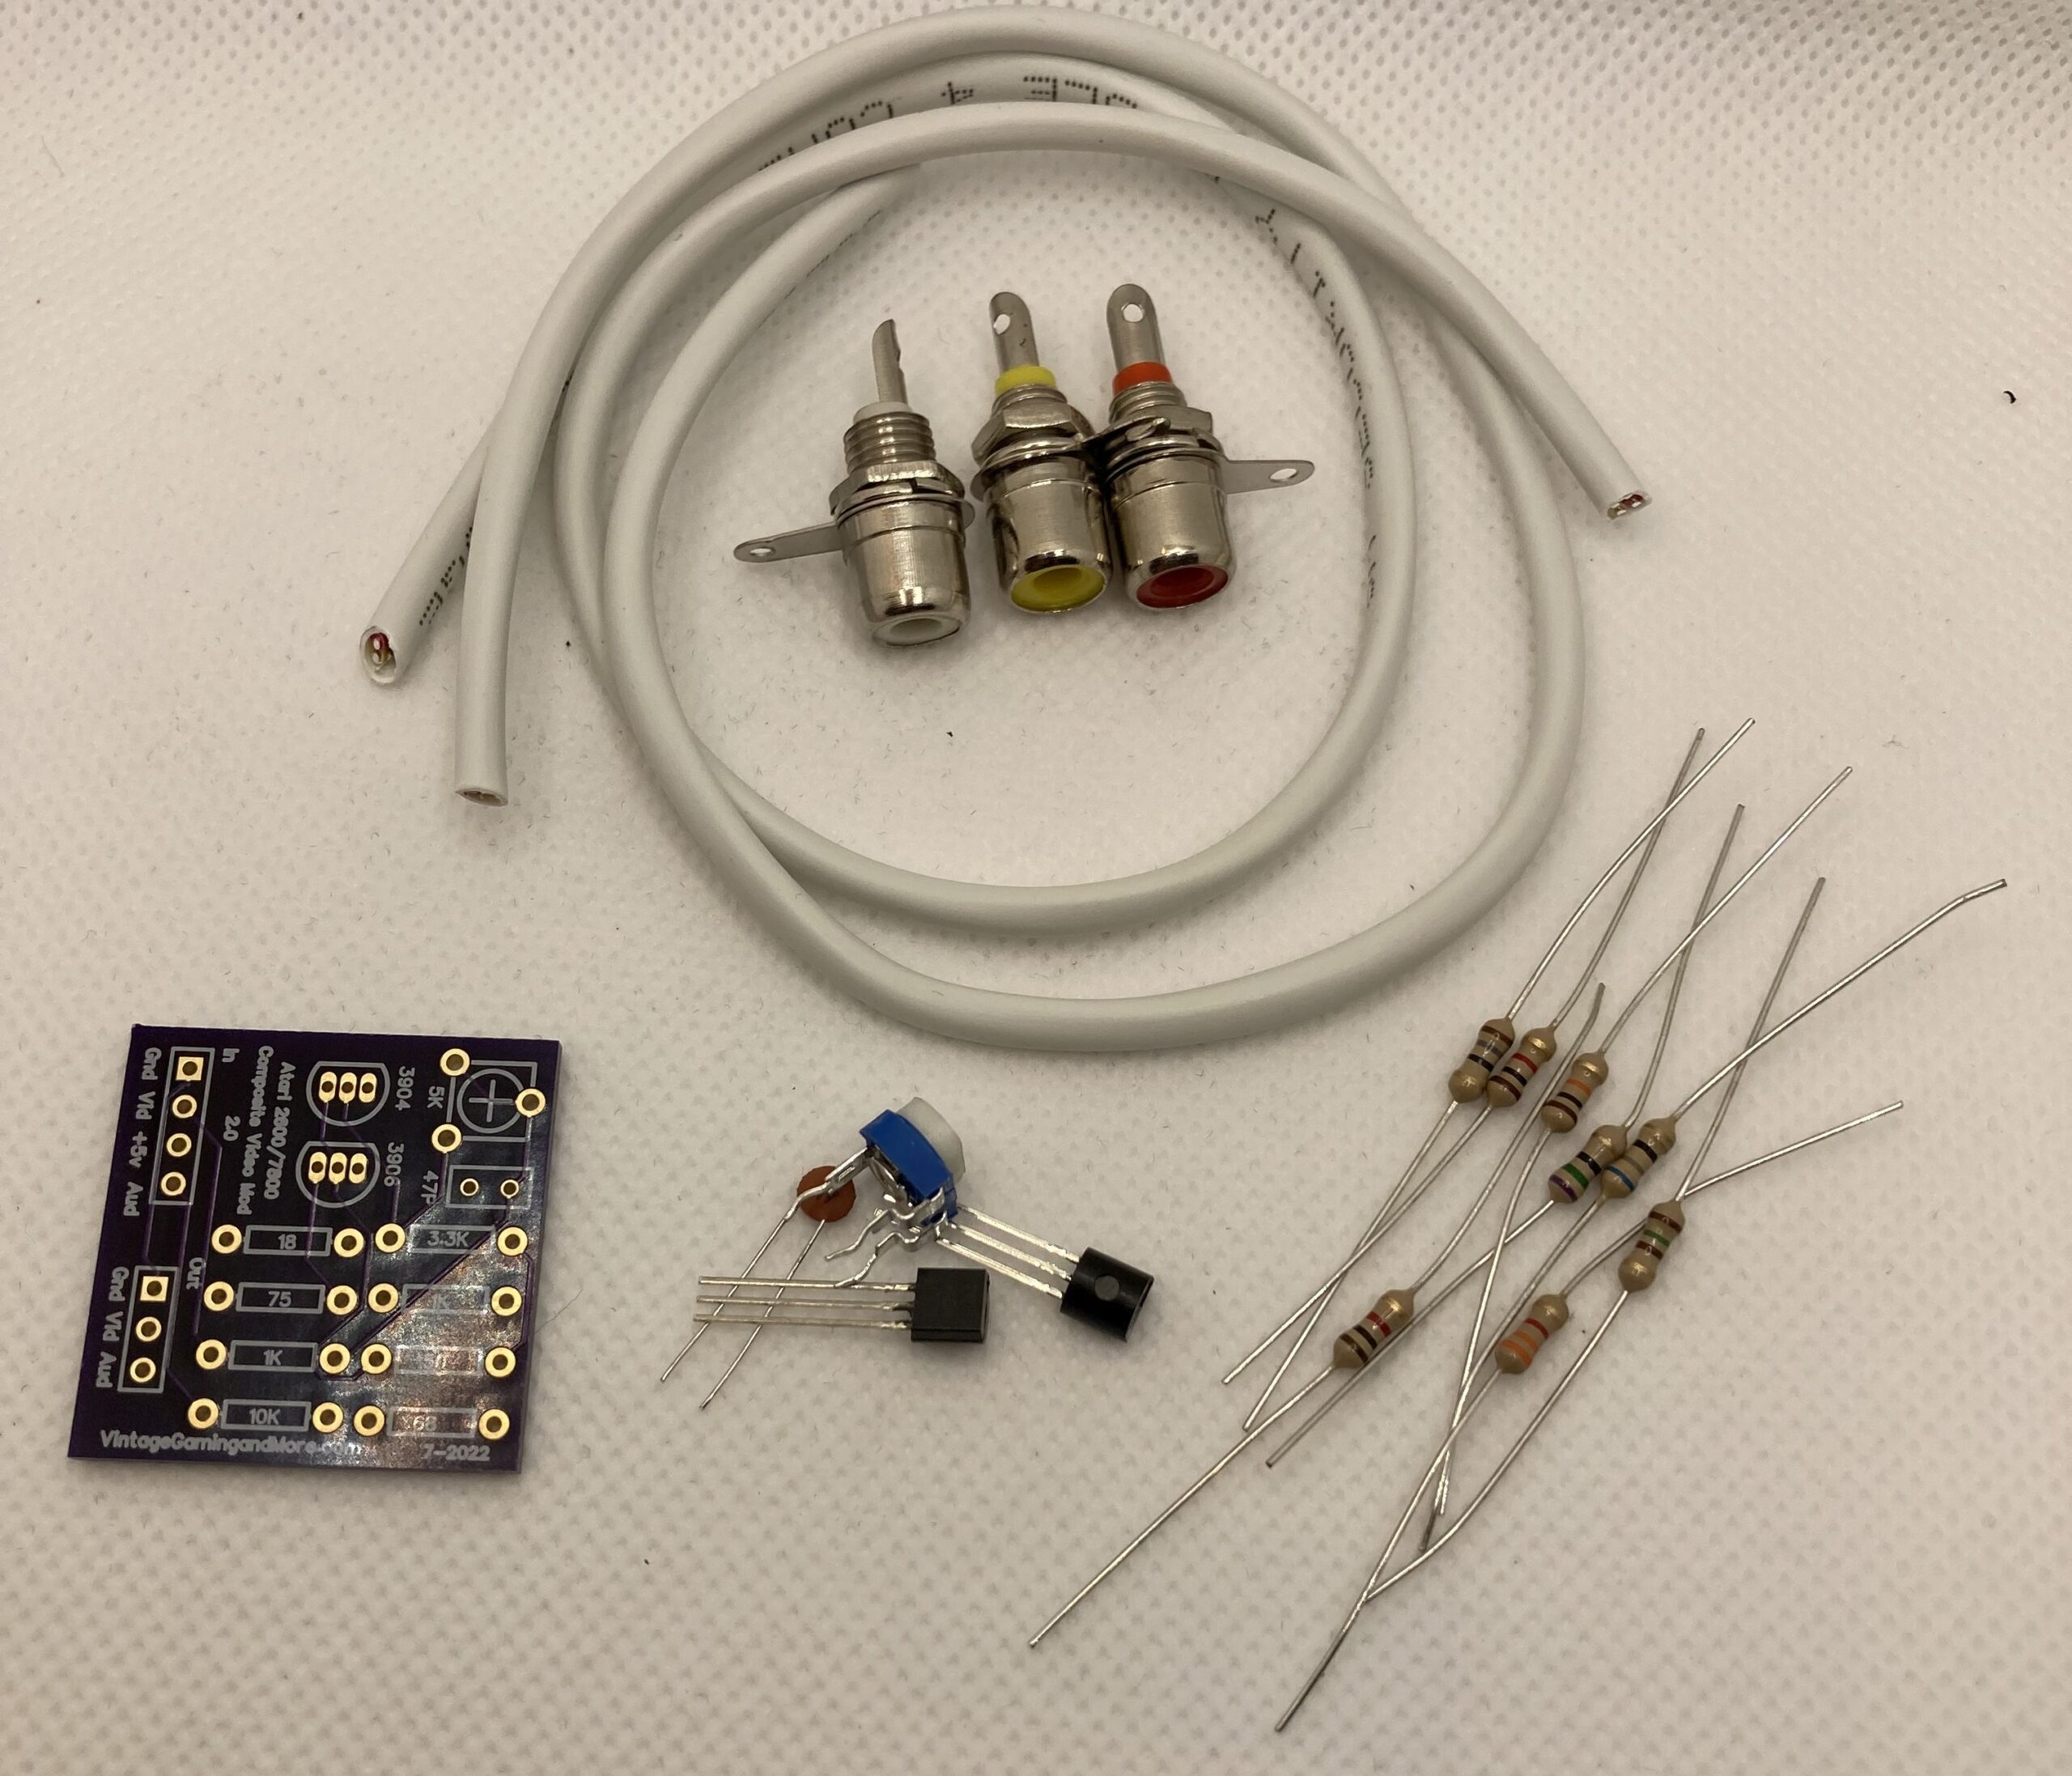
For the 2.0 video mod, the installation is exactly the same as the original kit, the only difference is the board. The first thing you should do it assemble the board using the included components and carefully follow the silkscreen to see where the parts go. The resistor color code is listed below if you are not sure how to use it.
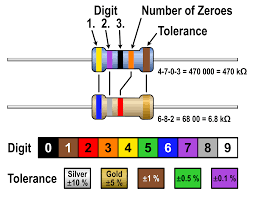
You can also use the picture of the assembled board above if you are unsure about how to use the color codes. The two black transistors need to be orineted the correct way, but the other compenents can be installed in either direction.
Strip the white sheathing off the wire to reveal the 4 wires inside. Be careful not to strip away so much that you dig into the wire. Attach the wires to the input and output as shown and match the colors.
For now you can leave the brightness adjustment as is, after the kit is installed and the Atari is plugged in and connected you can adjust the brightness as needed.
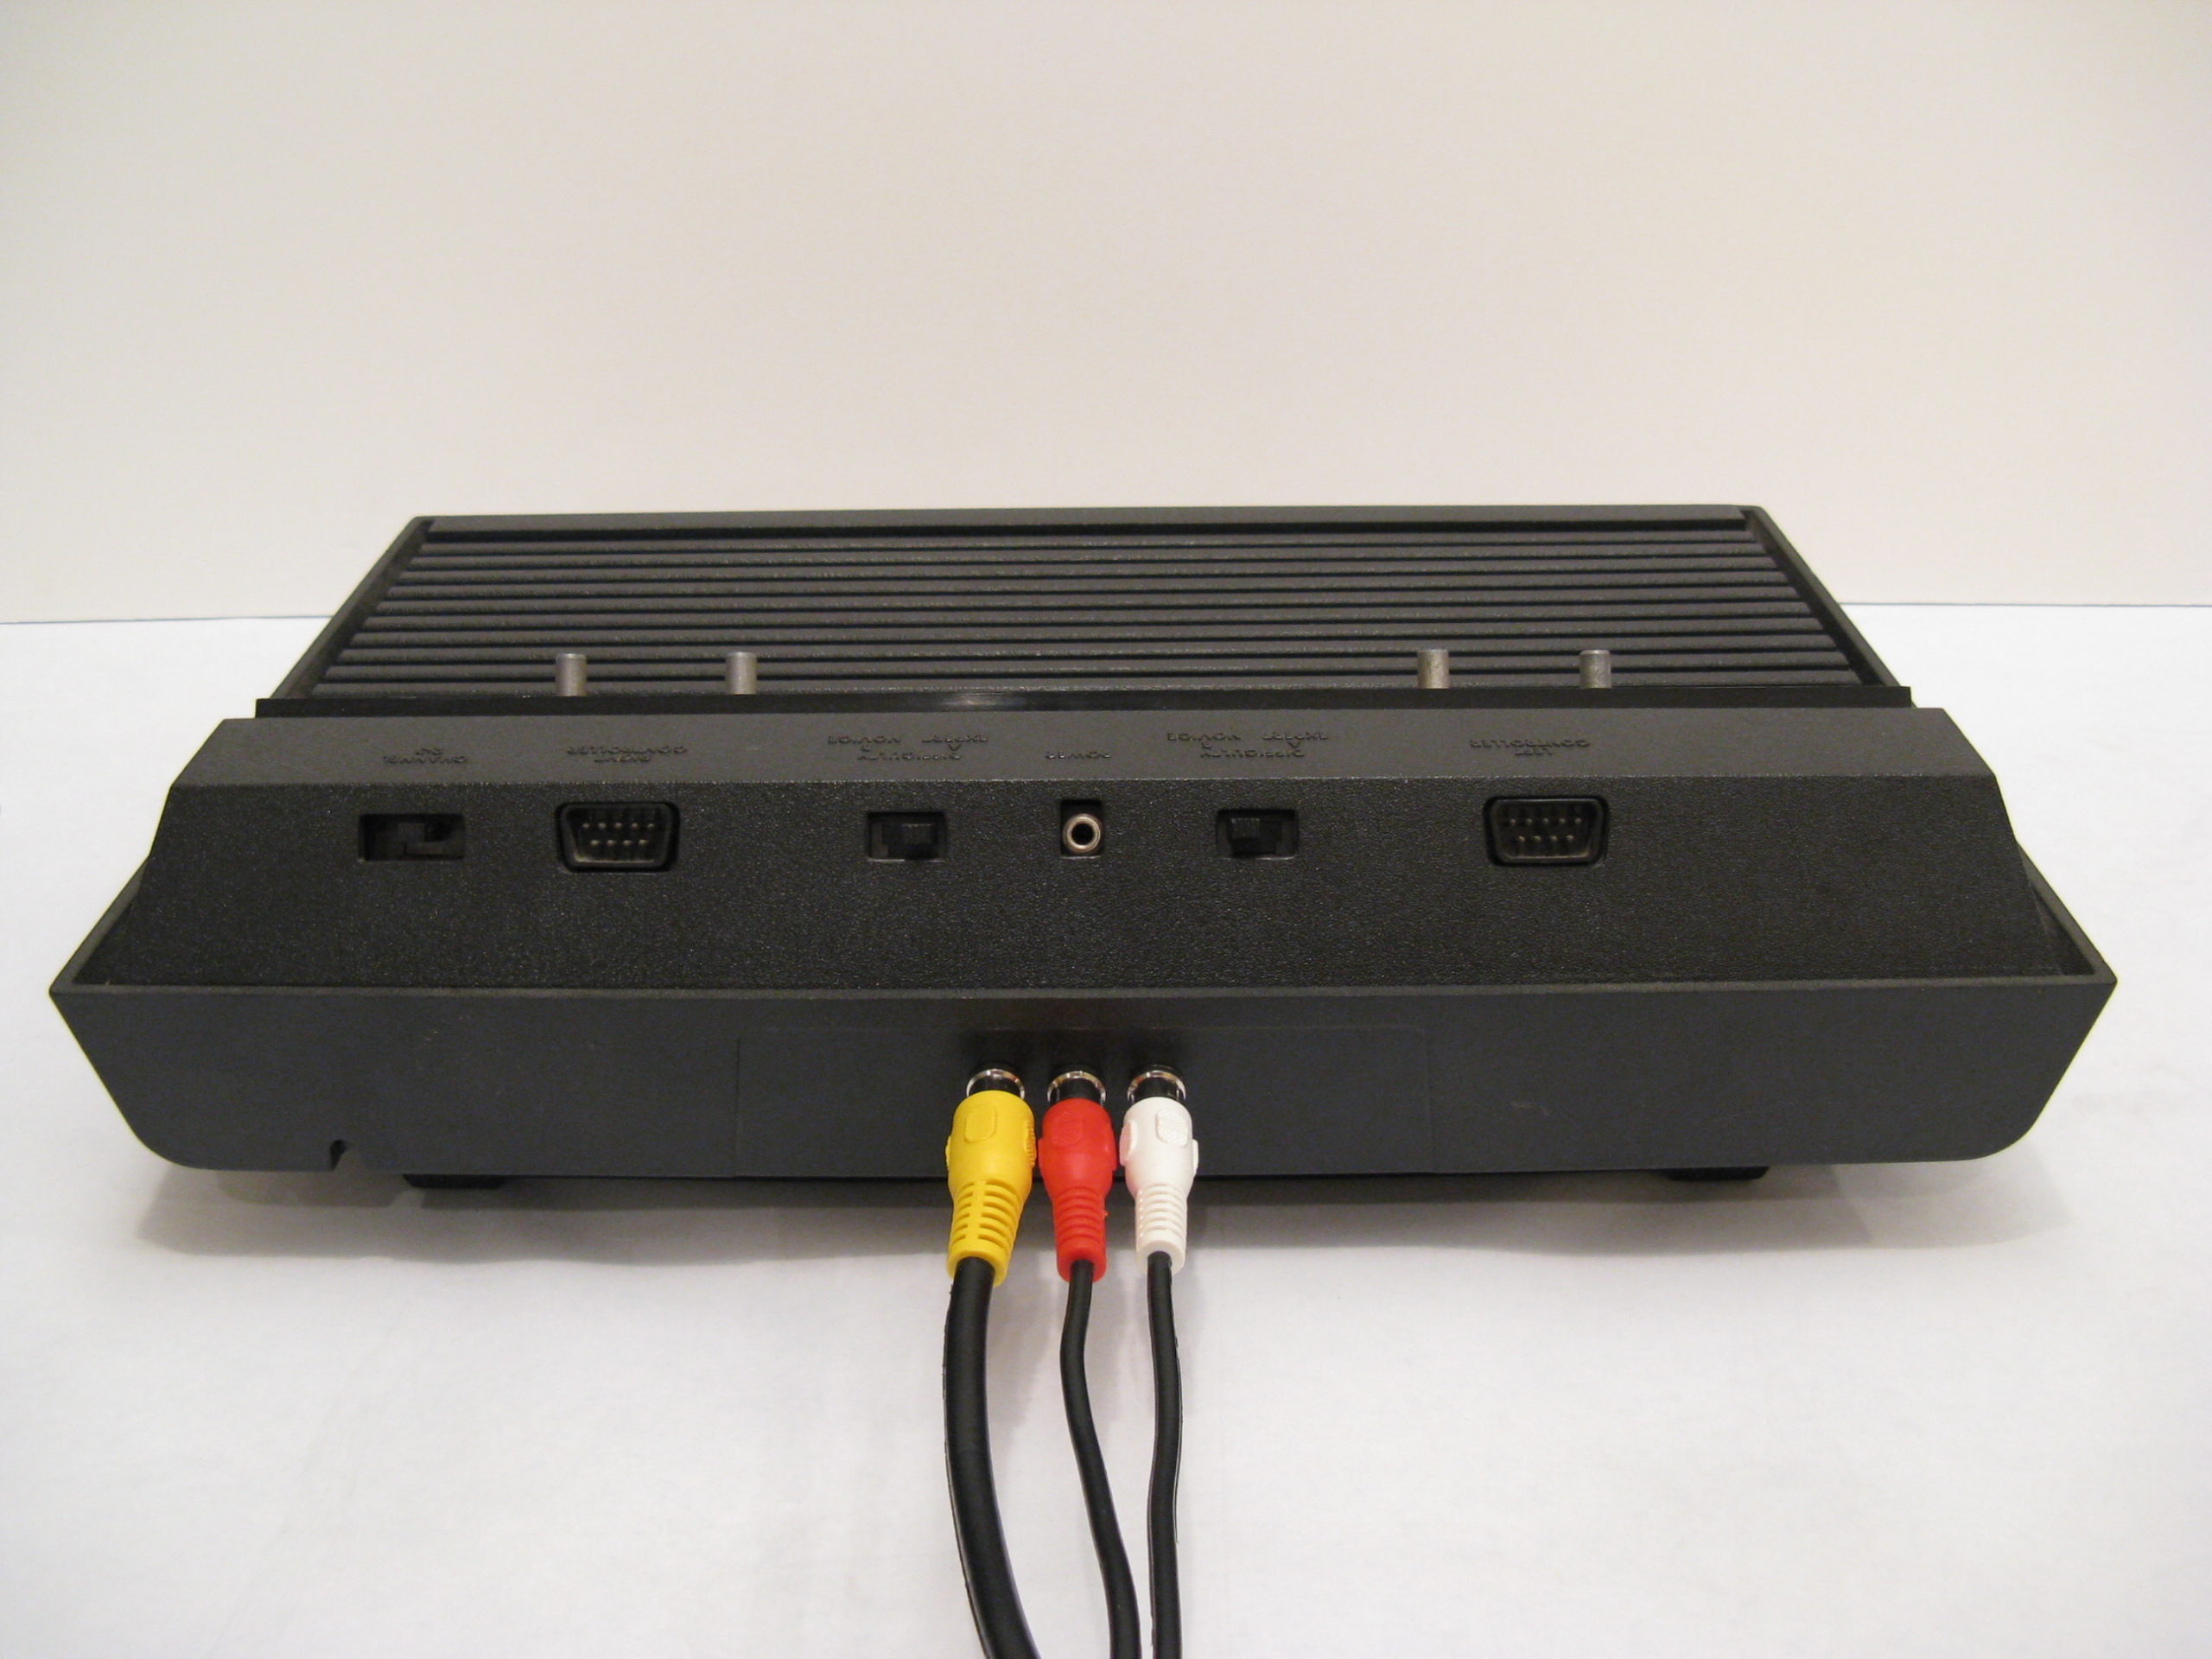
At this point, please use the links below based on your Atari model to find the rest of the steps in connecting it to the Atari: